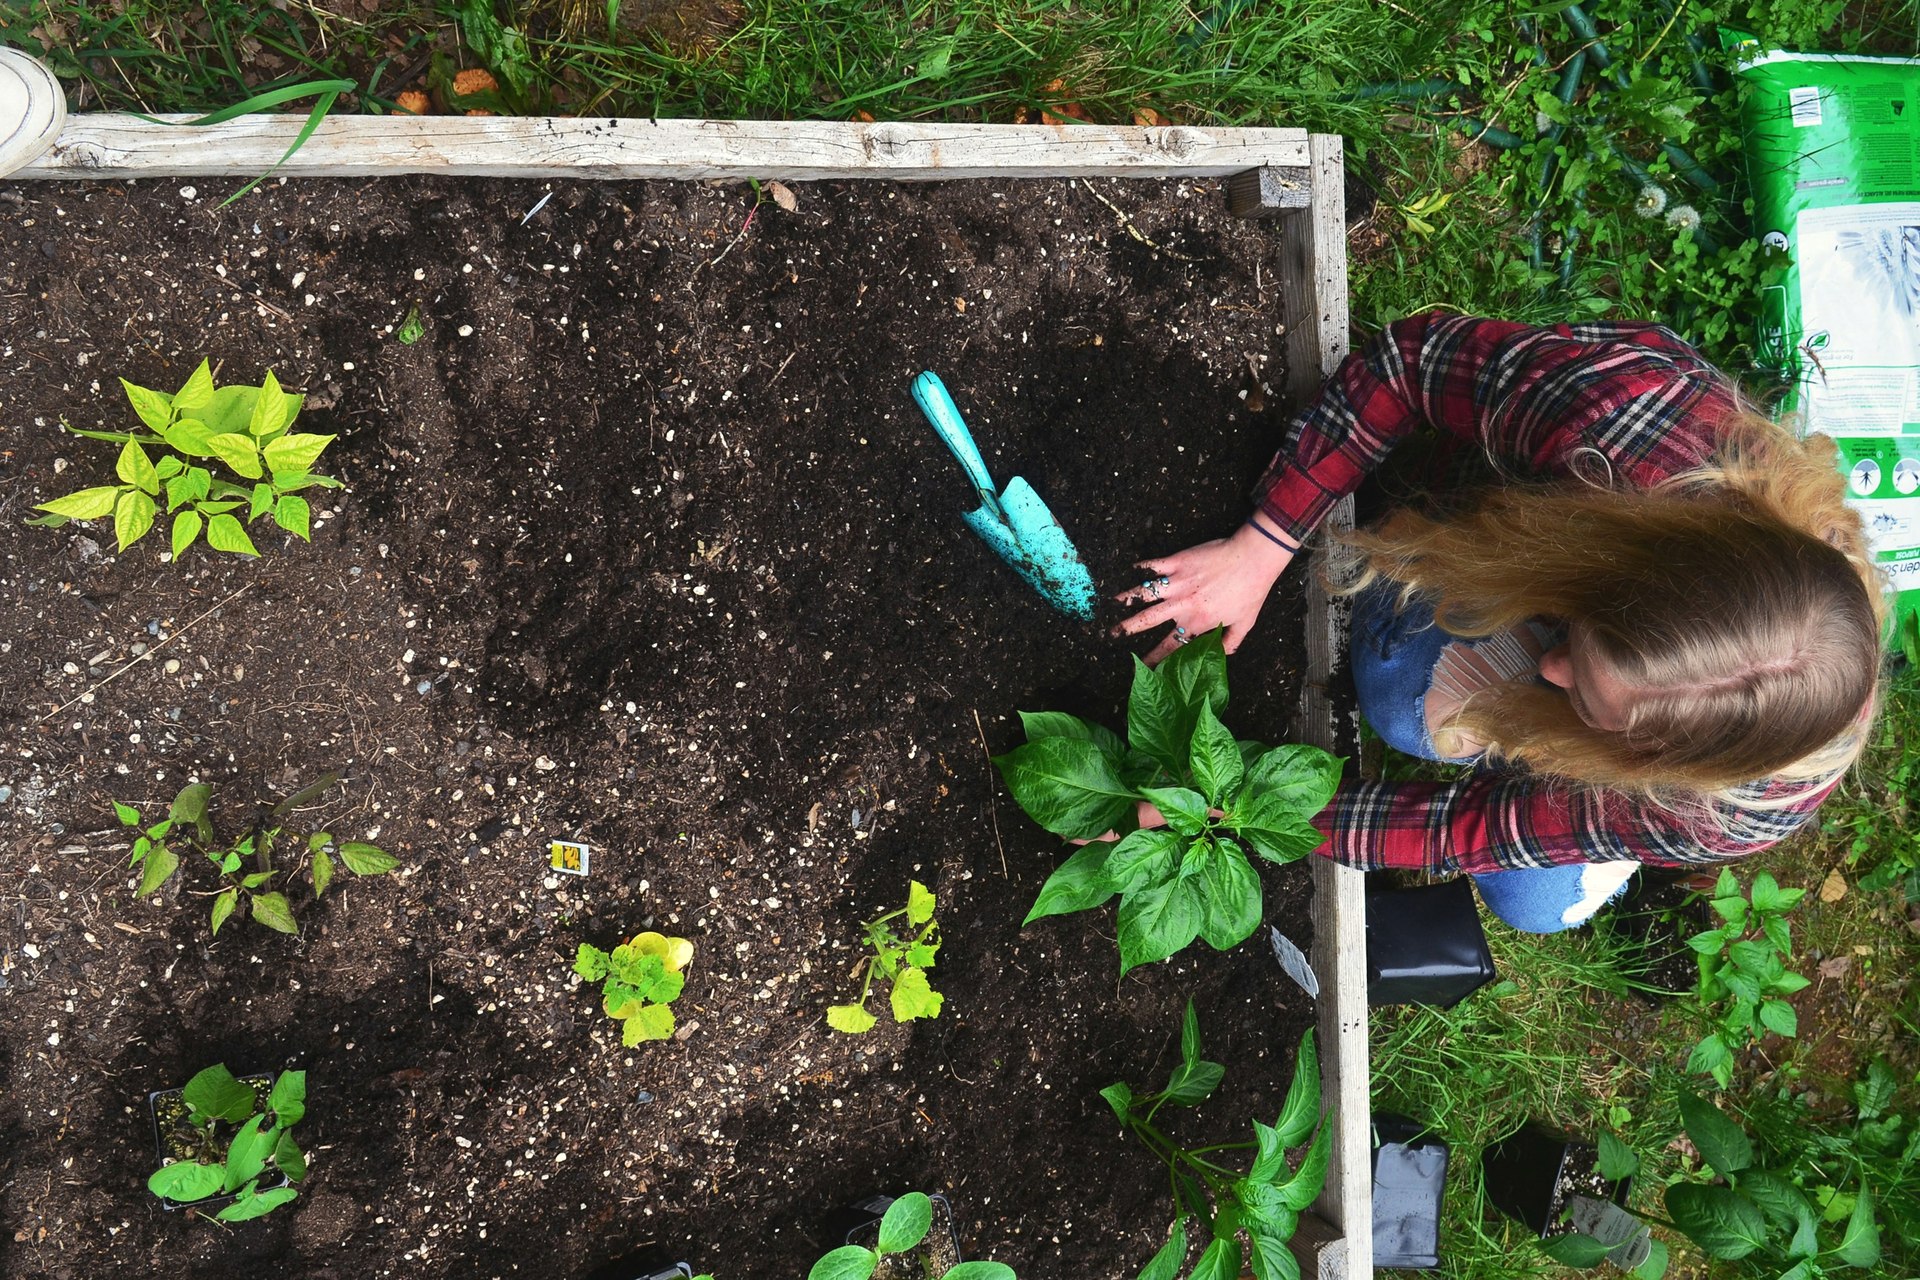
Find a sunny spot with water nearby
Start with a sunny spot that's easy to water and tend. Before you dig or buy pots, check these four things:
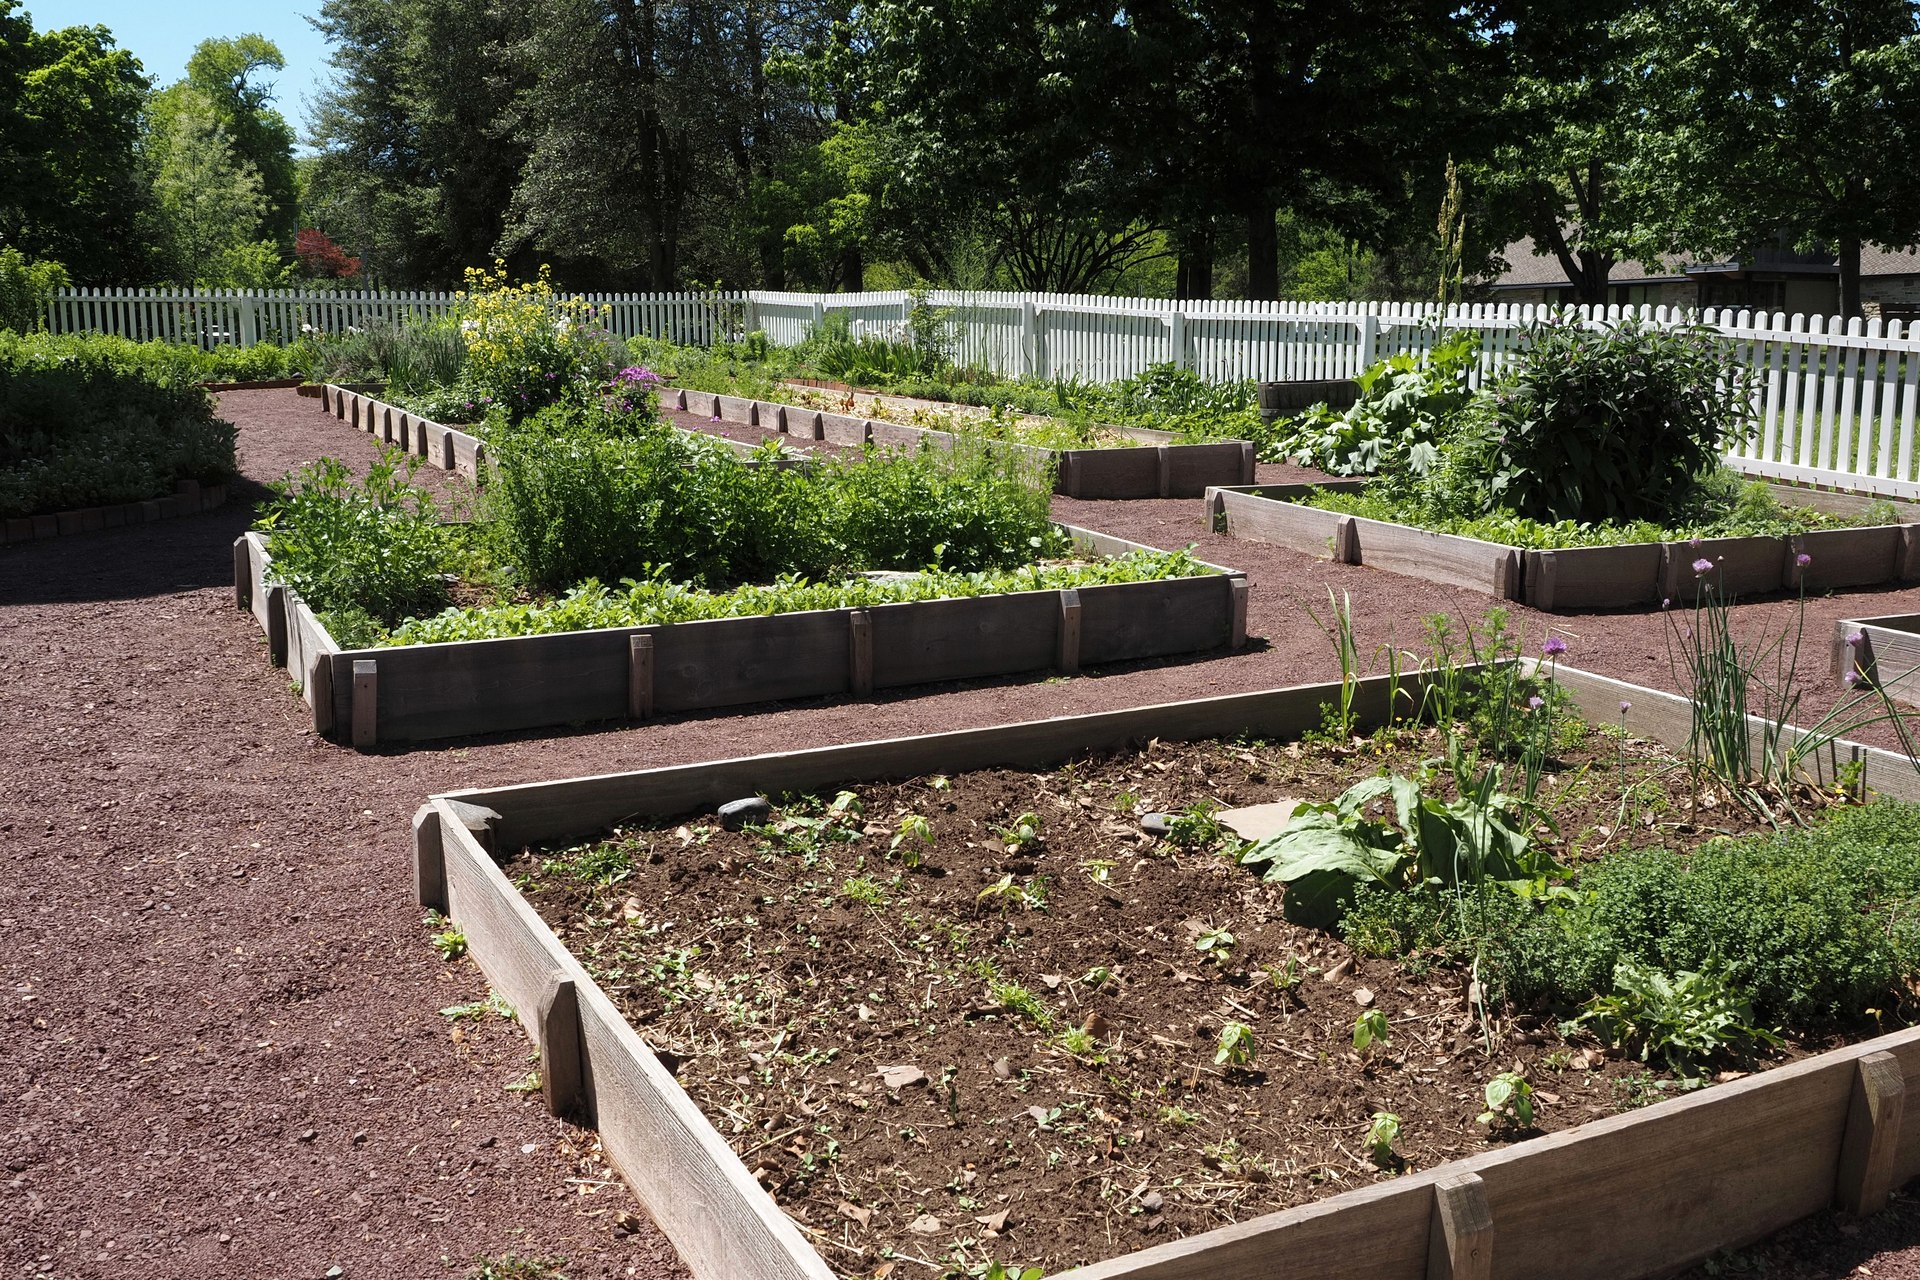
- Find enough sun. Tomatoes, peppers and squash need about 6–8 hours of direct sun. Watch where sun and shade fall over a clear day, and add up the sunny hours.
- Make watering easy. Check that your hose reaches, or choose a spot a short walk from the faucet if you'll use a watering can.
- Avoid soggy ground. Skip low spots where water collects after rain. Keep clear of large tree roots, which compete for water and nutrients.
- Leave room to work. Allow a clear path beside your bed or pots so you can water, weed and harvest without stepping on plants.
Only 4–6 hours of sun? Lettuce is an option for that spot. Use the sunlight guide if you're unsure how much direct sun you have.
Choose a bed or containers
Your vegetable garden could be a sunny border, a raised bed beside a path, or a few pots by the back door. Choose the setup that fits your ground and the space you can reach comfortably.
In the ground
Use an existing sunny bed or turn a corner of lawn into a vegetable patch. This suits soil that is easy to dig and drains after rain; there is no frame to build or large volume of fill to buy.
Raised bed

A raised bed gives vegetables a defined space and adds soil depth. A taller bed can mean less bending, but you will need a frame and enough suitable soil mix to fill it.
Containers
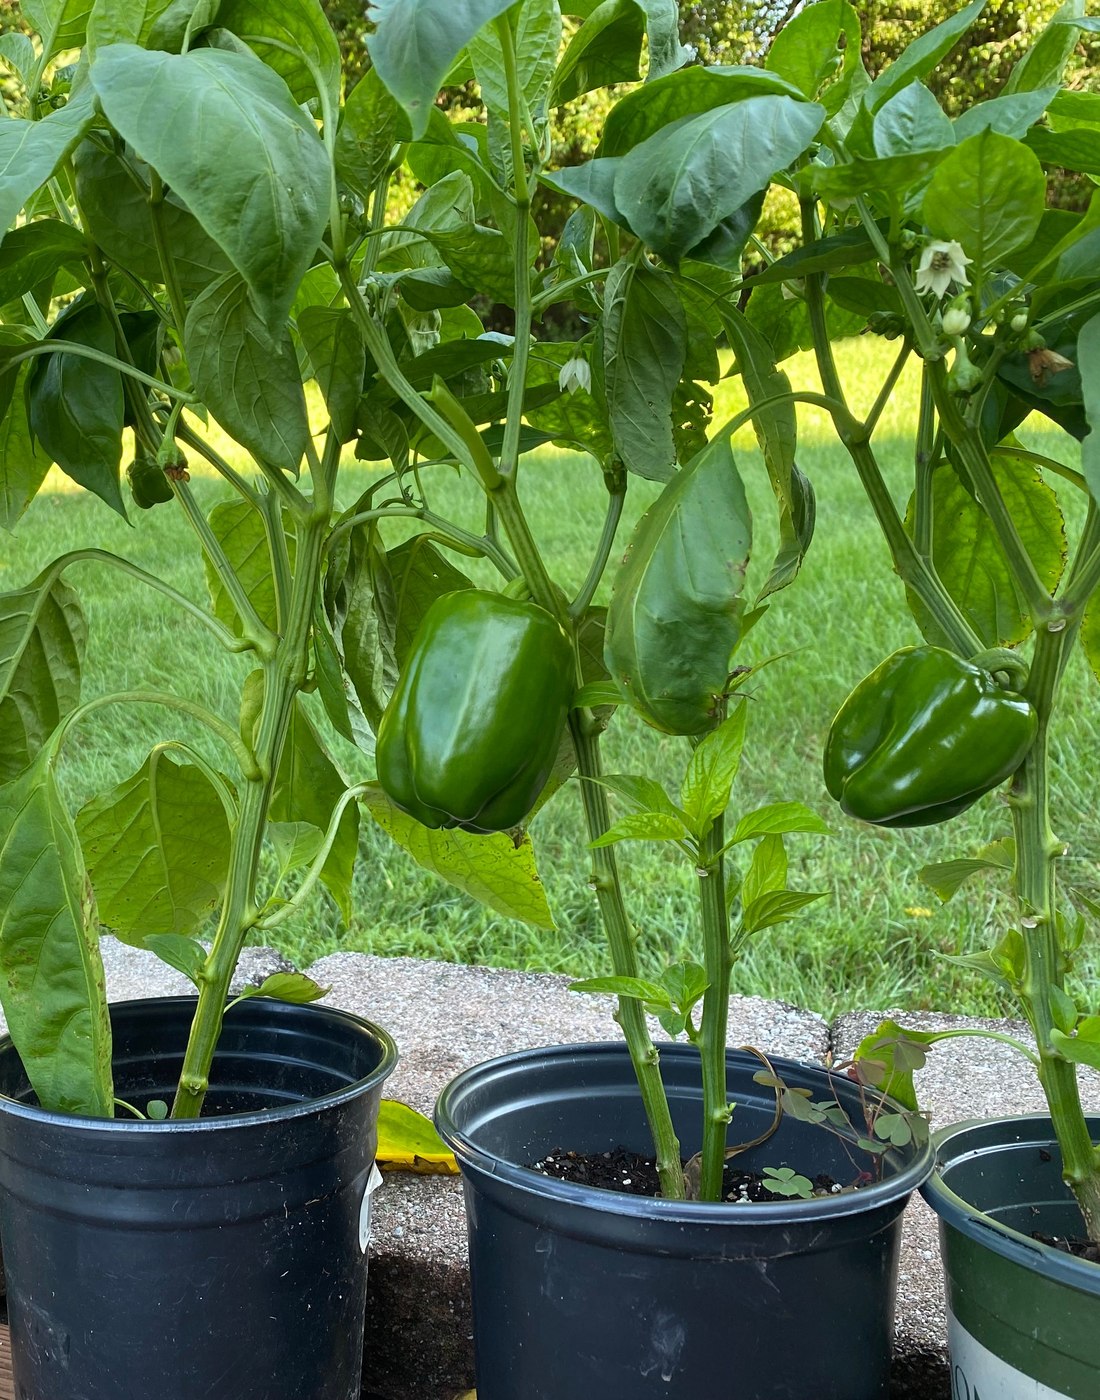
Turn a sunny patio or balcony into a little kitchen garden. Choose pots large enough for the vegetables you want; their mix can dry quickly, so plan for frequent moisture checks.
What you'll need to get started
Gather the basics for the garden you have in mind:
- For a garden bed: a fork or spade and a rake to clear and prepare the soil.
- For a raised bed: a frame and the appropriate soil mix described in Step 4.
- For pots: containers with drainage holes and potting mix.
A hand trowel, plant labels and a watering can or hose will come in handy whichever you choose. Next, pick the vegetables you'd love to eat, then choose your seeds, young plants and any supports they need.
Unsure about the soil in your yard? Near an older painted building, busy road, former factory or old orchard, ask a soil-testing laboratory about testing for lead and other contaminants before planting food. Describe the site's history so the laboratory can recommend suitable tests; a routine nutrient test may not include them.
Until you know, keep vegetables out of that soil. Use pots filled with potting mix whose supplier can confirm it has been checked for metals. An open-bottom raised bed does not isolate plants from contaminated ground. Never plant food in containers that held paint or chemicals.
If your raised bed will sit on paving, check how deep it needs to be and how water will drain before filling it.
Choose what to grow
What would you love to pick fresh: crisp salad leaves, sugar snap peas or sun-ripened tomatoes? Choose a few that fit your space and local season. Leaf lettuce and salad radishes suit cool weather; bush snap beans and tomatoes need warm soil. Spring is not the only planting window.
Compare 20 vegetables for your first garden
Leaf lettuce
Cool weatherFresh, tender salad leaves from a small patch or pot.
How to start: Sow seeds outdoors.
Watch for: Hot weather can make lettuce flower and taste bitter.
Approx. harvest: 4–6 weeks from seed for young leaves
Sun: Full sun or partial shade. Full sun in cool weather; afternoon shade can help when the weather turns hot.
Salad radishes
Cool weatherPull a small, crisp root to add to a meal.
How to start: Sow where they will grow; thin to the packet’s spacing, often 2 inches for small varieties.
Watch for: Roots can turn woody and hot if left too long.
Approx. harvest: 4–5 weeks from seed
Sun: Full sun or partial shade. May take longer to reach harvest size in partial shade.
Bush snap beans
Warm weatherTender pods from upright plants that need no trellis.
How to start: Sow seeds in warm soil after frost danger has passed.
Watch for: Seeds can rot in cold soil; wait for 60°F.
Approx. harvest: 7–9 weeks from seed
Sun: Full sun. Can grow with 4–6 hours, but may produce fewer pods.
Compact cherry tomato
Warm weatherWatch small fruits form and ripen in a sunny bed or pot.
How to start: Choose a healthy young plant. Check its full-grown size and fit the support that variety needs.
Watch for: Keep the root area moist as flowers and fruits develop.
Approx. harvest: 6–13 weeks from transplant
Sun: Full sun. Give tomatoes plenty of sun in cool summers. Extreme heat can stop new fruit forming.
Spinach
Cool weatherTender leaves for salads, omelets and a quick pan of greens.
How to start: Sow seeds outdoors in cool weather.
Watch for: Pick before hot weather sends up flower stalks.
Approx. harvest: 4–8 weeks from seed
Sun: Full sun or partial shade. Grow during the cooler months in your area.
Carrots
Cool weatherPull sweet, crunchy roots for dinner. Short, round varieties are fun to try.
How to start: Sow straight into loose soil; keep the seedbed moist.
Watch for: Stones and hard soil can distort roots. Choose short varieties for pots.
Approx. harvest: 9–11 weeks from seed
Sun: Full sun. Can also grow with about 5–6 hours of sun.
Kale
Cool weatherPick leaves for soups or roasting; baby leaves are ready sooner for salads.
How to start: Sow seeds or plant young plants in spring or late summer.
Watch for: Give full-size plants room to spread; pick young leaves for a softer texture.
Approx. harvest: 6–12 weeks from seed
Sun: Full sun or partial shade. Grows best in cool weather.
Swiss chard
Cool weather · tolerates heatColorful stems brighten your plate. Pick young leaves before the plant reaches full size.
How to start: Sow seeds in spring or late summer, or start with young plants.
Watch for: Thin crowded seedlings so the leaves have room to grow.
Approx. harvest: 7–10 weeks from seed
Sun: Full sun or partial shade. Can grow with four to six hours of direct sun.
Sugar snap peas
Cool weatherSweet, crunchy pods you can eat whole.
How to start: Sow outdoors in early spring; add a trellis for climbing varieties.
Watch for: They prefer cool weather. Pick tender pods before the seeds get large.
Approx. harvest: 7–10 weeks from seed
Sun: Full sun. Can grow with 4–6 hours, but may produce fewer pods.
Beets
Cool weatherChoose red, golden or striped roots for roasting. Eat the thinnings in salads.
How to start: Sow seeds outdoors in spring or late summer.
Watch for: One seed cluster can make several seedlings; thin them to leave room for roots.
Approx. harvest: 7–9 weeks from seed
Sun: Full sun or partial shade. Choose a sunnier spot if you want larger roots.
Cucumbers
Warm weatherGrow crisp slices for summer lunches or little cucumbers for pickling.
How to start: Sow in warm soil after frost, or plant young plants.
Watch for: Give vines a trellis; choose a bush variety if space is tight.
Approx. harvest: 7–10 weeks from seed
Sun: Full sun. Check that the leaves will get sun as the vine climbs its support.
Zucchini
Warm weatherPick small, tender squash for grilling, fritters and summer suppers.
How to start: Plant a young transplant after frost in warm soil, or sow seeds directly.
Watch for: The leaves spread wide. Check often once fruits start growing.
Approx. harvest: 7–10 weeks from transplant
Sun: Full sun. Leave enough sunny space for the plant to spread.
Sweet peppers
Warm weatherTry crisp bells or long, sweet frying peppers in a sunny bed or pot.
How to start: Plant young plants once the soil and weather are warm.
Watch for: Green bells can be picked full-size; leave them longer for their ripe color.
Approx. harvest: 10–12 weeks from transplant for green bells
Sun: Full sun. Afternoon shade can help protect peppers from sunburn in hot weather.
Eggplant
Warm weatherGlossy purple fruits and handsome leaves make a lovely summer planting.
How to start: Start with young plants after frost, in thoroughly warm soil.
Watch for: Add support as plants grow; pick while the fruit is still glossy.
Approx. harvest: 8–12 weeks from transplant
Sun: Full sun. Plant away from the shade of taller vegetables, fences and buildings.
Arugula
Cool weatherPeppery leaves to toss into salads or scatter over pizza.
How to start: Sow seeds outdoors in cool weather.
Watch for: Pick young leaves for a milder flavor; heat encourages flowering.
Approx. harvest: 3–7 weeks from seed
Sun: Full sun or partial shade. Can grow in partial shade, though leaves may grow more slowly.
Bok choy
Cool weatherCrunchy stems and tender leaves for stir-fries; pick young leaves sooner.
How to start: Sow seeds or plant young plants in spring or late summer.
Watch for: Choose a compact variety for pots and harvest before flower stalks form.
Approx. harvest: 6–12 weeks from seed
Sun: Full sun. Choose a spot with at least six hours of direct sun.
Broccoli
Cool weatherCut a fresh green head, then look for smaller shoots to follow.
How to start: Start with young plants in spring or fall. Fall plantings may take longer to mature.
Watch for: Harvest while the buds are tightly closed, before yellow flowers appear.
Approx. harvest: 8–10 weeks from transplant
Sun: Full sun or partial shade. More sun helps the plant develop its central head.
Cabbage
Cool weatherGrow a crisp head for slaw, roasting or homemade sauerkraut.
How to start: Plant young plants in spring or for a fall harvest.
Watch for: Leave room for the outer leaves. Cut the head when it feels firm.
Approx. harvest: 8–13 weeks from transplant
Sun: Full sun. Keep nearby plants from shading the leaves.
Green onions
Cool weatherSnip fresh green tops or pull slender onions for soups and salads.
How to start: Sow seeds, or plant onion sets, small bulbs grown for planting.
Watch for: Keep the soil moist and clear weeds while plants are small.
Approx. harvest: 7 weeks or more from seed
Sun: Full sun. Can also grow with about 5–6 hours of sun.
Okra
Warm weatherTall plants with yellow flowers and tender pods for summer cooking.
How to start: Plant young transplants after frost in warm soil, or sow seeds directly.
Watch for: Give plants room to grow tall. Pick pods young, before they turn tough.
Approx. harvest: 7–9 weeks from transplant
Sun: Full sun. Needs a sunny spot to flower and produce pods.


Count from sowing for seeds, or from planting out for transplants. These are approximate times to start checking; variety and weather make a difference. Follow your packet or tag for the variety you choose.
Read the packet or tag for full-grown size, spacing and support. “Cherry” describes a tomato's fruit, not its vine size. For pots, look for a compact variety such as 'Tiny Tim' or 'Tumbling Tom'.

Buying young plants? Ask whether they have already been hardened off—gradually adjusted to outdoor sun and wind. If not, allow time for hardening off before planting.
Check planting dates and the forecast
Use the planting-date guide to find a calendar for your area, then check your vegetable, this week's forecast and its soil-temperature needs.
Plan and prepare your garden
Turn your choices into a planting space: mark out the bed, prepare the soil and work out where each plant will go.
Mark bed edges and paths
Lay string or a garden hose around the bed before you dig or build. A bed 2–4 feet wide is usually manageable with access from both sides. Kneel at the outline and check that you can reach the middle without stepping inside. Make it narrower if needed, especially against a fence where you can only work from one side.
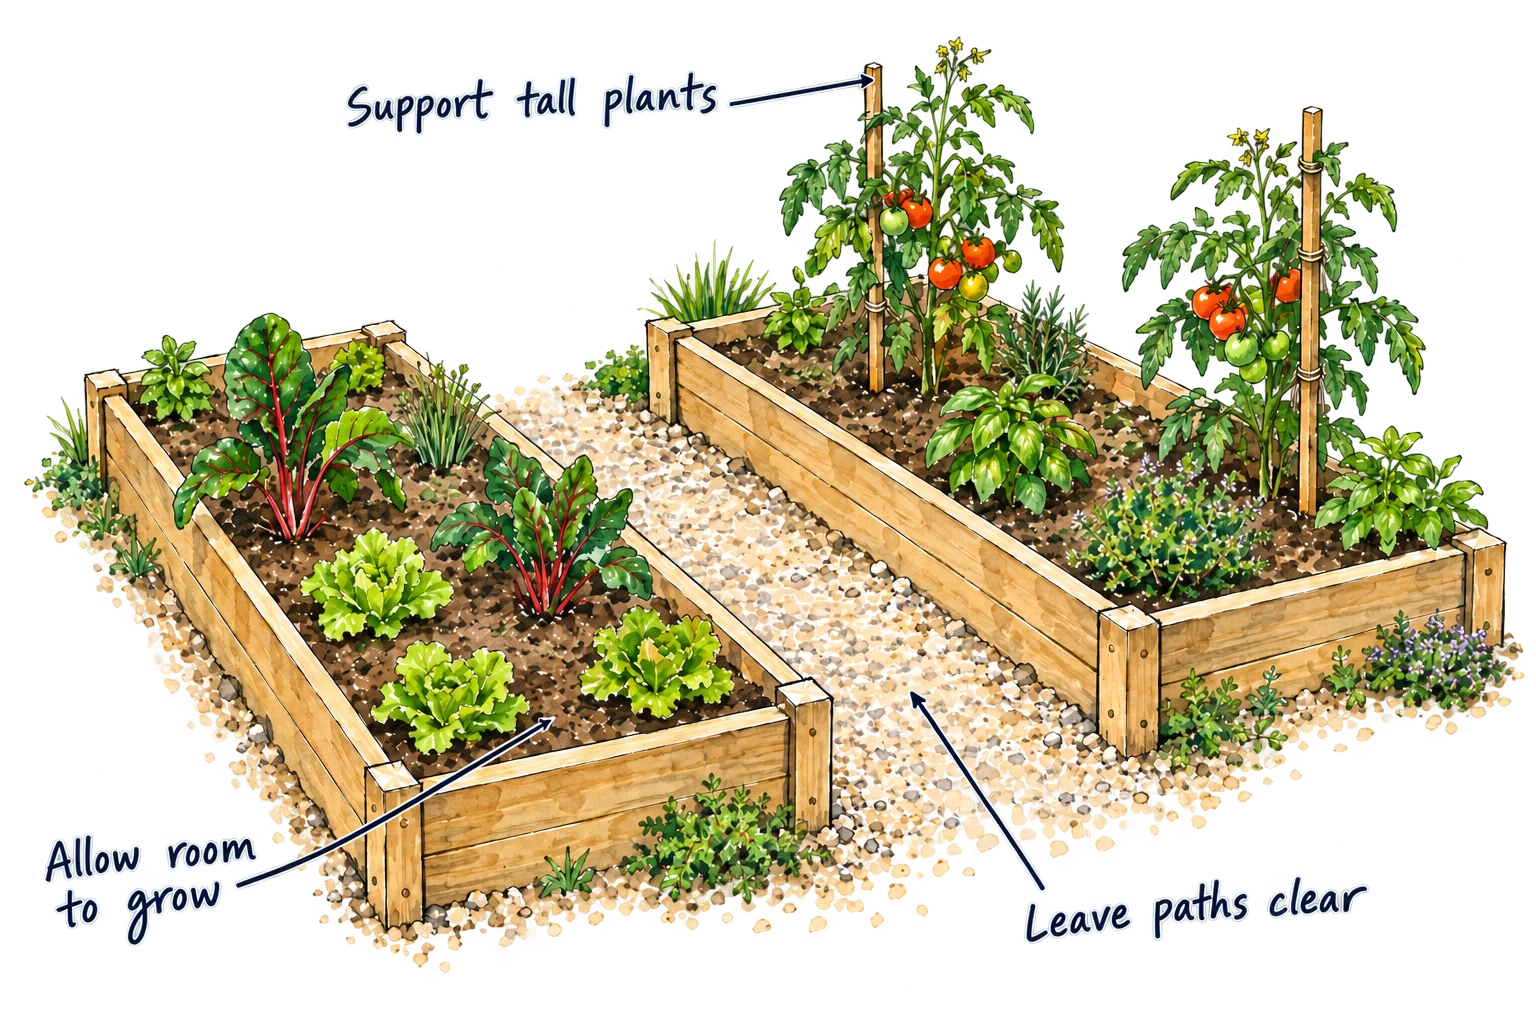
Walk around the outline with your watering can, or push your wheelbarrow through the gap. Leave room to turn and kneel. For containers, put the empty pots in position before filling them; they'll be much harder to move afterward.
Prepare the bed or pots
Use the instructions for the garden you're making. Garden beds and containers need different preparation and different soil mixes.
In the ground

Clear the grass and weeds, including their roots. If you're converting lawn and want to plant soon, slice underneath the turf with a spade and lift it out. If you have time to wait, cover the grass with plain, unwaxed cardboard with the edges overlapping and tape removed, then hold it down with 2–4 inches of compost. Keep it covered until the grass has died; persistent weeds may need removing separately.
Before digging, squeeze a handful of soil. If it crumbles when you nudge it, you can work it. If it's sticky and smears, let it dry a little. Working wet soil can leave hard clods behind.
Where the ground is compacted, push in a garden fork, rock it back and forth, then move 6–8 inches and repeat. Leave soil that's already loose undug. For a new bed with heavy clay or thin topsoil, work about 2 inches of finished plant-based compost into the loosened soil. Rake the surface level, breaking up large clods where you'll sow small seeds.
Raised bed
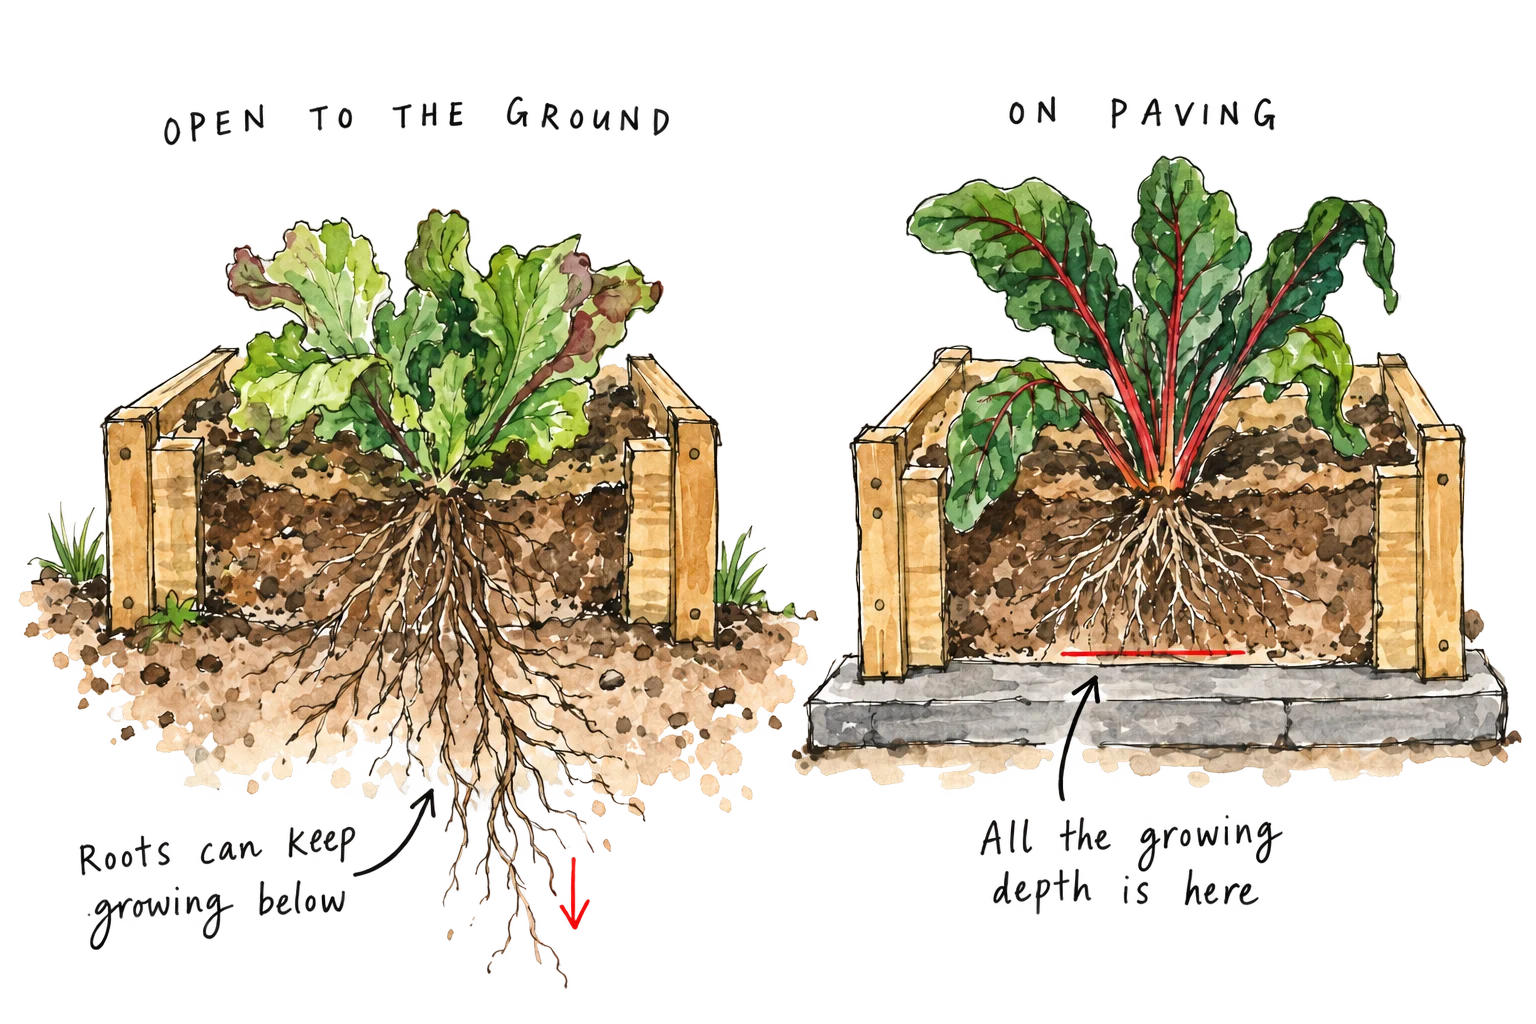
Clear the ground and loosen compacted soil beneath an open-bottom bed, then set the frame level. Check bed depth and drainage before filling, especially if it will stand on paving.
- Over garden soil: buy a topsoil-and-compost blend, or mix two buckets of topsoil with one bucket of finished plant-based compost. Mix them together before filling.
- On paving: use equal parts finished plant-based compost and soilless growing mix. The bed must provide all the root space your vegetables need; roots can't grow down into the paving.
Compost alone settles as it breaks down, so don't use it as the whole fill. These recipes use compost made from plant material. Composted manure can contain much more salt and nutrients; follow its product rate. Keep fresh manure out of a bed you're about to plant.
How much soil? Multiply the inside length × width × fill depth, all in feet. A bed measuring 4 × 8 feet inside, filled 1 foot deep, takes 32 cubic feet—about 1.2 cubic yards. Use the depth you intend to fill, rather than the full height of the boards.
Containers
Wash reused pots and clear the drainage holes. Choose pots large enough for your vegetables, then fill with container potting mix, moistened first so it takes up water evenly. Garden soil can pack tightly in a pot and drain poorly. Leave some space below the rim to hold water while it soaks in.
To buy potting mix, add up the pots' stated fill capacities and compare that volume with the bag size, using the same units. Allow for the space left below each rim.
Check the bag before adding fertilizer: the mix may already contain it. Follow its feeding instructions.
What about soil testing?
For an unfamiliar patch of yard soil, a soil test can tell you whether it needs nutrients or a change in acidity. You collect small samples at home and mail them to a testing service; the report recommends what to add and how much.
Choose a laboratory that tests garden soil and follow its sampling instructions, including the sampling depth, amount and packaging. Take the sample before adding compost, fertilizer or lime. A handful of soil can tell you how it handles, but it can't tell you its nutrient levels.
Set out your plants before digging holes

Stand young plants on the prepared soil while they're still in their pots. Read each tag's planting distance and measure from the center of one plant to the center of the next, not between the leaf edges. Keep the full distance even while the plants are small.
For seeds, mark the rows and check both the row spacing and the final spacing between plants. Step 5 explains sowing and thinning.
Allow room for cages or trellises as you arrange the plants. Position taller vegetables where they won't shade the shorter ones.
If you're using drip tubing or a soaker hose, lay it beside the planting rows and run it before planting. Check that the soil gets wet where the roots will be. A watering can or ordinary hose is also fine for a small garden.
Set aside straw or shredded leaves for mulch after planting. Spread it once seedlings are established; leave newly sown rows uncovered and keep mulch away from stems.
Check spacing, supports and access
- You can reach every planting spot without stepping on the soil.
- The soil is prepared, or your bed or pots are filled.
- Plant positions or seed rows are marked, with room for full-grown plants and their supports.
- You can get water to each planting spot.
Plant seeds and young vegetables
Sow seeds directly into the prepared soil, or plant young vegetables. Plants raised indoors or under cover need time to adjust to outdoor conditions before planting day.
Sow seeds outdoors
Check the packet's planting window, depth and spacing. If you're still deciding which vegetables to grow from seed, see starting seeds indoors or sowing outside.
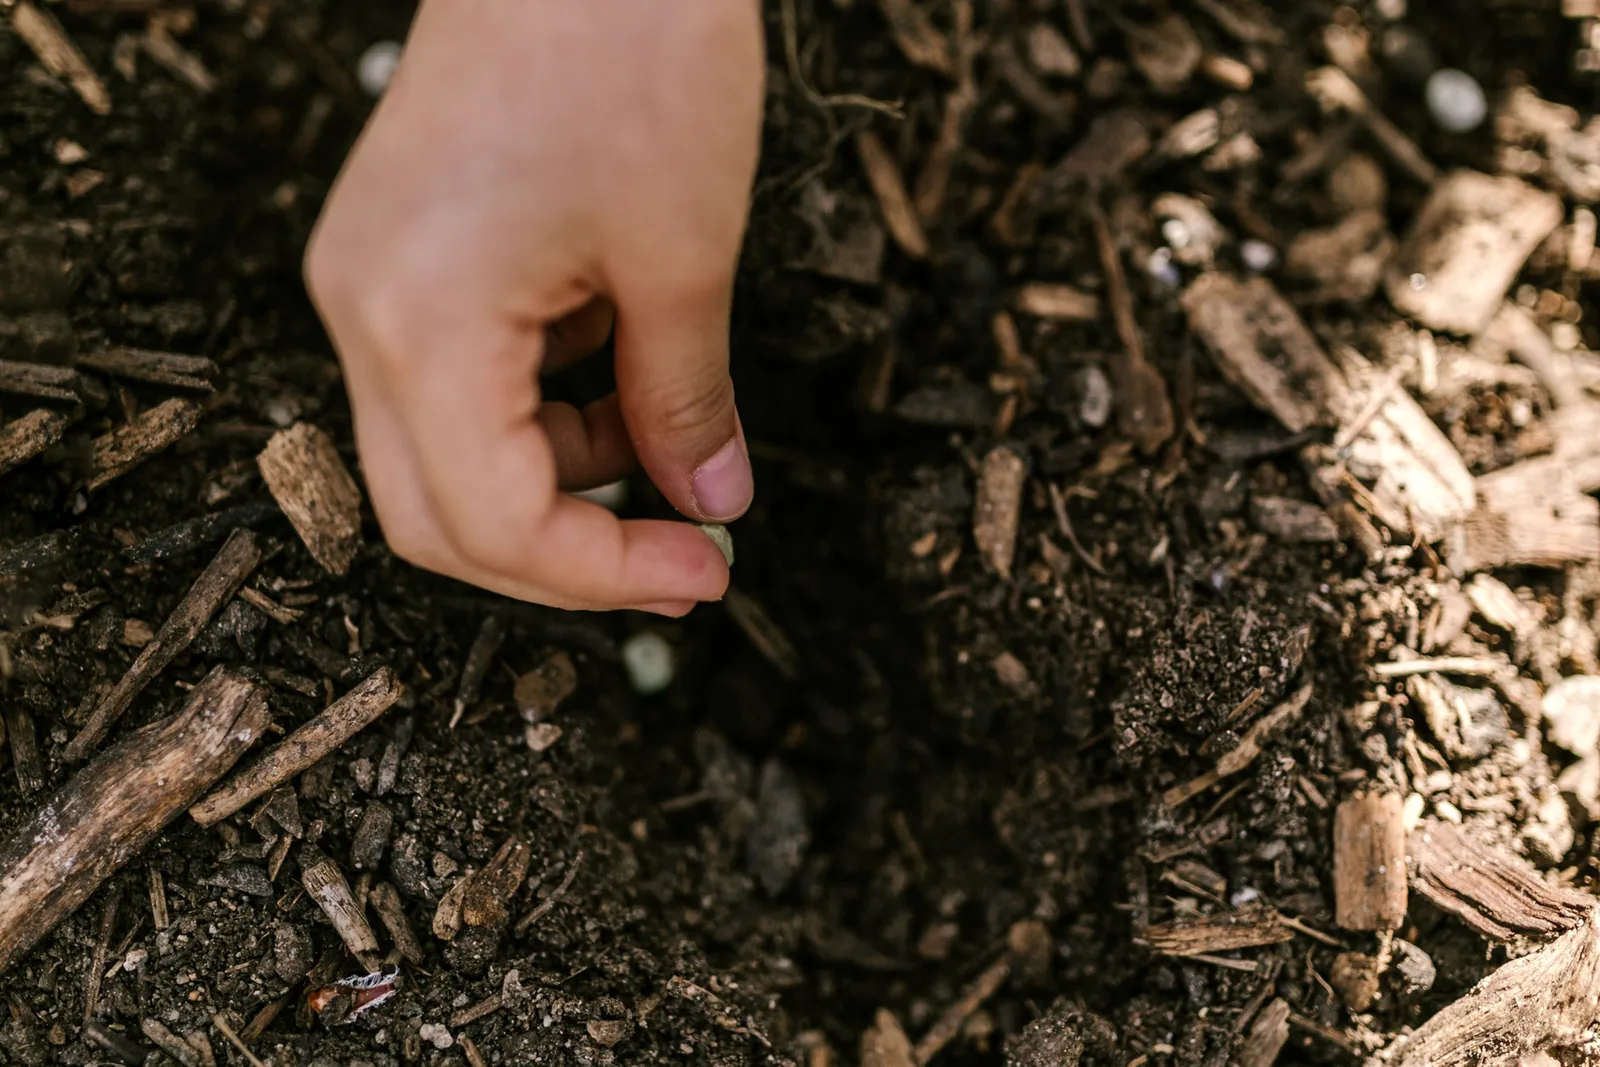
- Make a shallow row or individual holes. Use the packet's depth. About twice the seed's width is a useful starting rule, but some tiny seeds need light and little or no covering.
- Sow, cover and gently firm. Space the seeds as directed, cover them to the right depth, then press lightly so the soil touches each seed. Label the vegetable, variety and sowing date.
- Water with a fine spray. Moisten the seed row without washing seeds away. Keep it moist while seeds sprout; a dry surface crust can make it harder for seedlings to emerge.
Once seedlings are growing, thin crowded rows: remove extras to leave the packet's final spacing. Snip unwanted seedlings at soil level if pulling them would disturb the roots of those you're keeping. This reduces competition for light, water and nutrients.
Plant young vegetables
Harden seedlings before transplanting
Get sheltered plants used to outdoors first. This is called hardening off. Allow about 7–14 days for plants raised indoors or under cover; ask the nursery whether purchased plants have already been hardened off.
Start with a few hours in a shaded spot protected from wind. Give them more time outside and a little more sun each day. Bring tender plants such as tomatoes and peppers inside if nights will fall below 50°F. Keep them watered; don't let them wilt to toughen them up.
Plant and water the seedlings
Choose a cloudy, calm day or late afternoon to help reduce stress while planting.
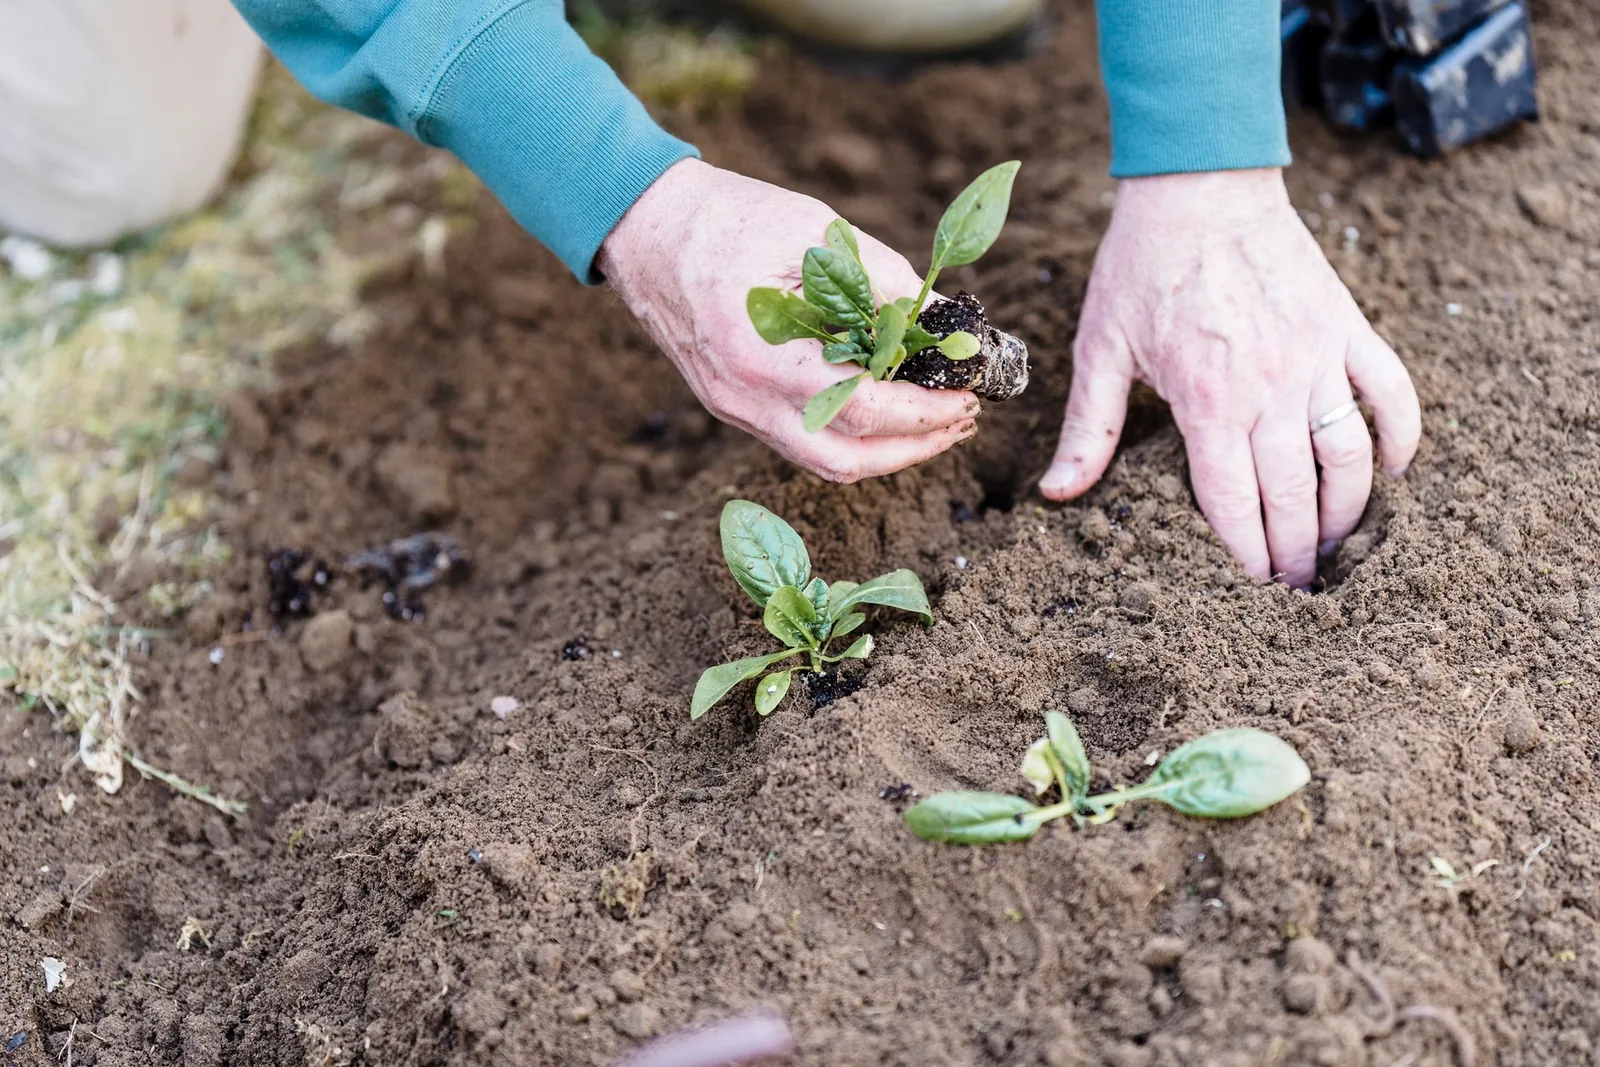
- Water before taking plants out of their pots. A few hours beforehand is ideal. Ease each plant out while supporting the root ball, the soil held together by its roots. Don't pull it by the stem.
- Set the planting depth. Dig a hole wide enough for the roots without cramping them. Set most vegetables with the top of the root ball level with the surrounding soil.
- Fill, firm and water. Fill around the roots, press gently and water slowly at the base to settle the soil. Fit any stakes or cages now, before roots spread, and anchor them securely to carry the weight of growing plants.
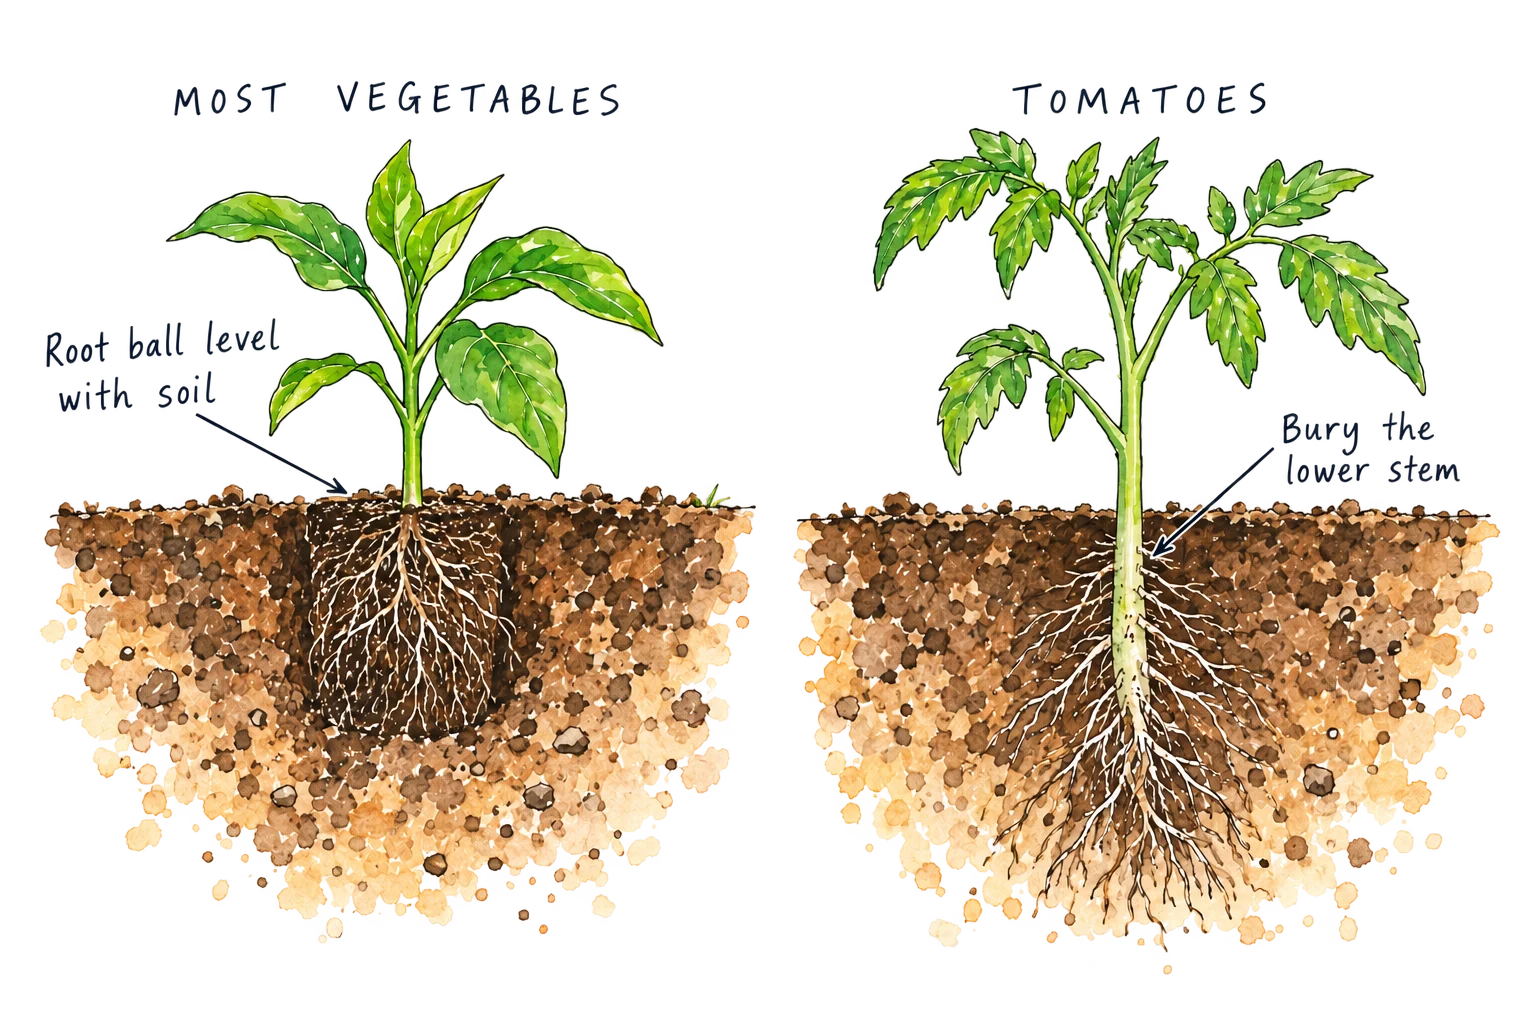
Tomatoes are an exception to the depth rule. Remove the lower leaves and plant deeper, burying up to two-thirds of the stem while keeping the upper leaves above the soil. Roots can form along the buried stem.
Check the seed rows and young plants again the next day. Step 6 explains where to feel for moisture and when to water.
Check the soil, water and harvest
Your plants are in. Now build a simple routine: check the soil, water when it's needed and pick vegetables while they're good to eat. A short visit most days helps you notice changes before they become problems.
Feel the soil below the surface
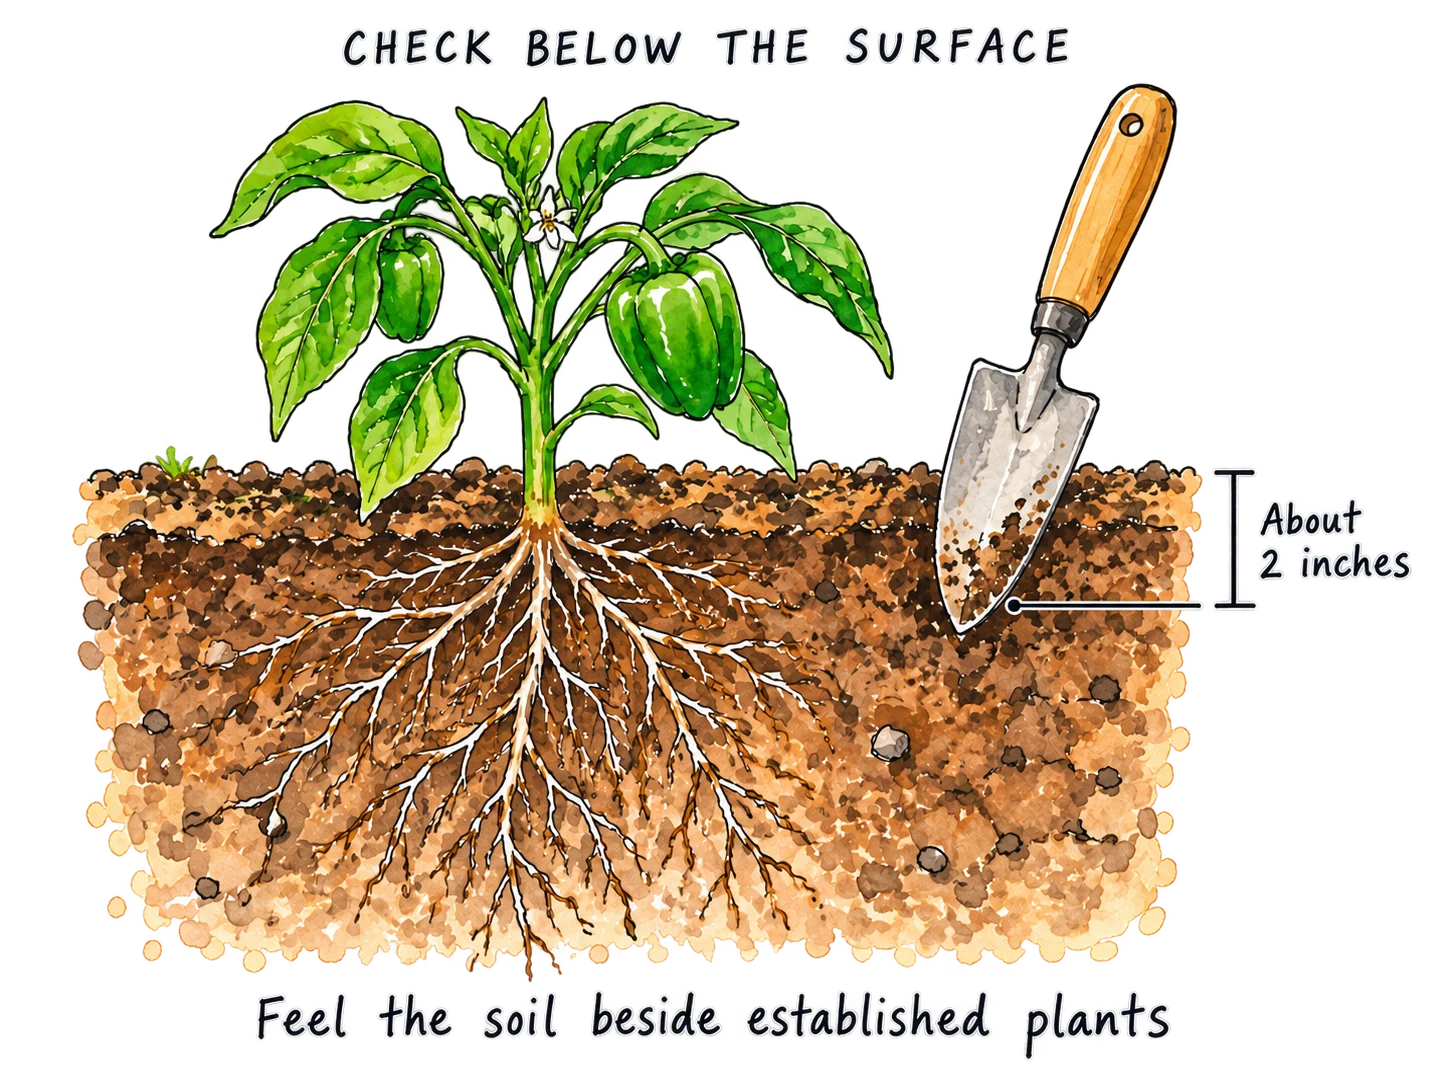
A dry-looking surface can hide damp soil underneath. For established plants, use a finger or narrow trowel to feel about 2 inches below the surface beside the plant, avoiding visible roots. Still moist? Wait. Dry at that depth? Water.
For seeds and tiny seedlings, feel the soil next to the row at the packet's sowing depth without uncovering seeds. Keep this shallow layer evenly moist.
For new transplants, check the root ball and nearby soil. The potting mix around the roots can dry differently from the garden soil.
Check pots daily while you learn how quickly they dry, and again later on very hot or windy days. A wilted plant is a reason to check the soil, not proof that it needs more water. If the soil stays soggy, check drainage before watering again.
Water slowly, then check again
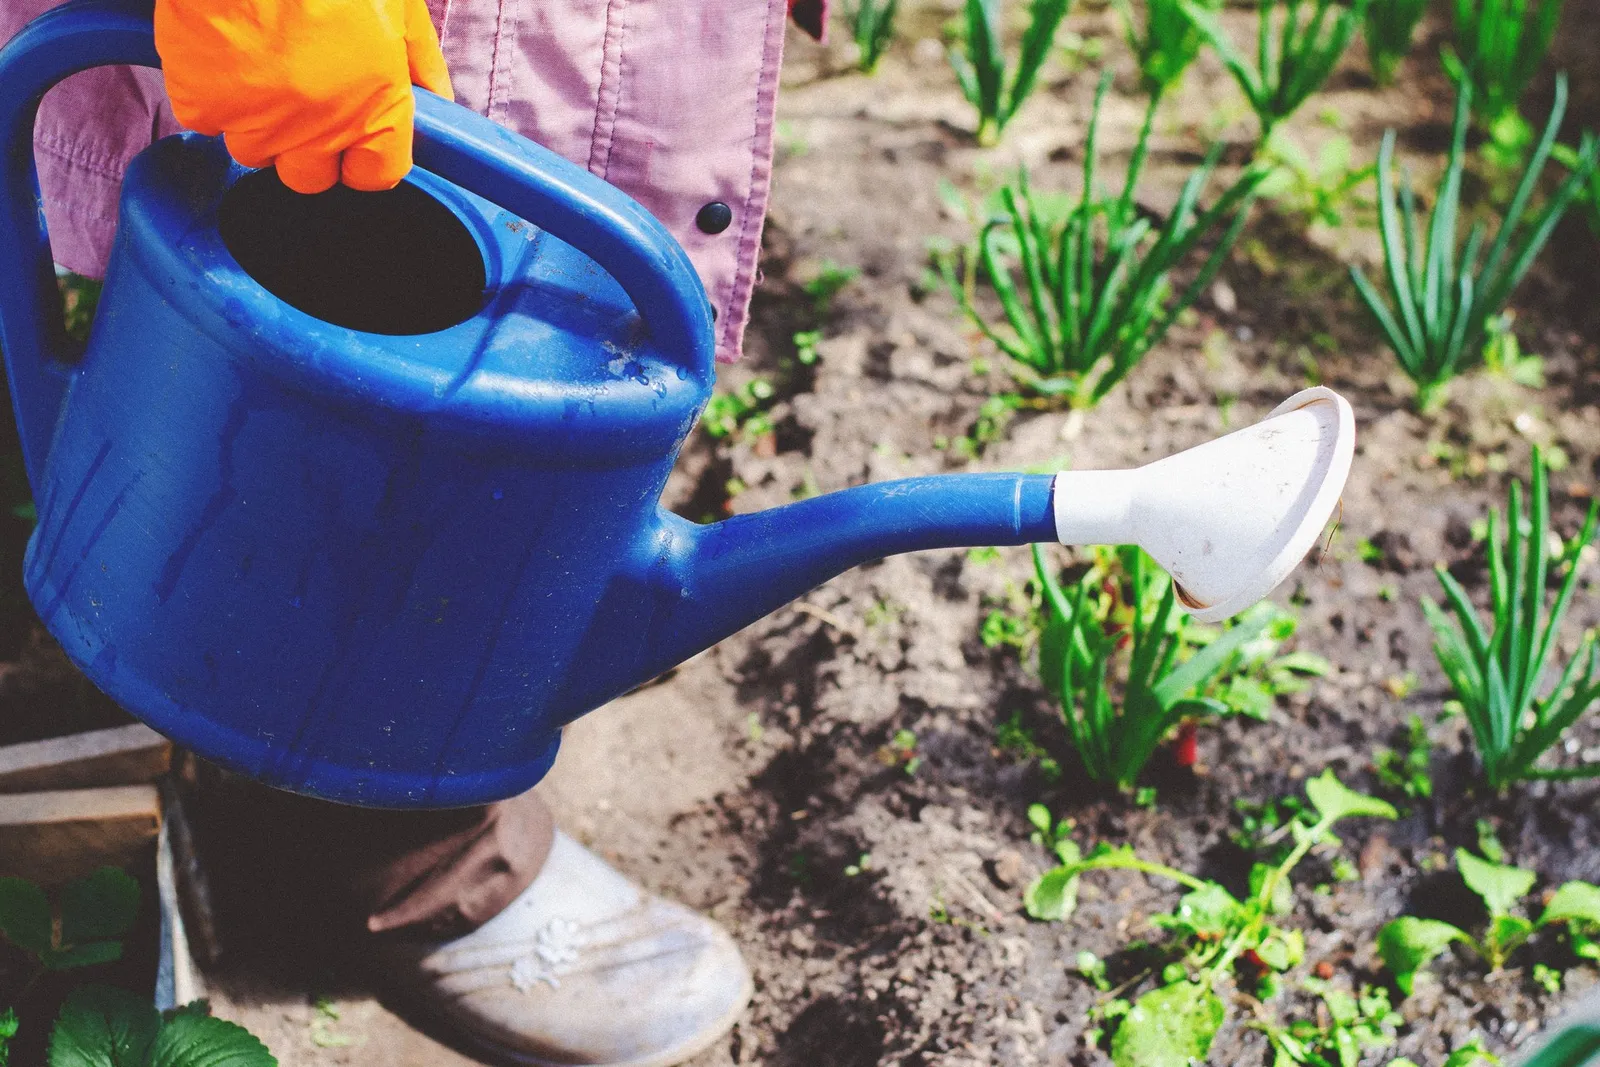
Aim a watering can, gentle hose or drip line at the soil around the roots. Morning is a good time to water, but don't leave a dry, wilting plant waiting until the next day.
In beds, wet the root area thoroughly, rather than just sprinkling the surface. If it puddles or runs off, pause and let it absorb before continuing. After watering, check below the surface again to make sure the water reached the soil you tested. Use a fine spray around seeds so they stay in place.
In pots, water the potting mix slowly and thoroughly until excess drains from the bottom. Empty saucers afterward. For self-watering pots, follow the reservoir instructions rather than treating them like ordinary pots.
How much water? Around an inch a week, including rain, is a starting guide for a vegetable bed—about 5 gallons over a 2 × 4 ft bed. It isn't a fixed dose or a rule for pots. Weather, plant size and soil change what is needed; use the moisture checks above to decide. A rain gauge helps you keep track of what has already fallen.
Pick vegetables when they're ready
Use the packet's harvest time to start checking for ripe vegetables. These are useful cues for four starter vegetables:

- Leaf lettuce: Snip a few tender outer leaves when they're large enough to use. Leave the center growing for more pickings.
- Salad radishes: Pull one when it reaches the packet's harvest size. Leaving them too long can make them woody.
- Bush snap beans: Pick firm, tender pods before the seeds make obvious bulges. Check again regularly once plants start producing.
- Compact cherry tomato: Pick at the variety's ripe color, which may be red, yellow or orange. Don't use red as the test for every variety.
Salad radishes give one root per plant; leaf lettuce, bush snap beans and tomatoes can give repeated pickings. How much you harvest depends on variety, weather and care. Notice what your household actually uses before making the garden bigger.
Remove weeds and check for pests
Pull small weeds before they spread, check that supports are secure and look under leaves as well as on top. If leaves turn yellow, use the yellow-leaves guide to work out what to check before choosing a treatment.
On your next visit, feel the soil, look over the plants and pick anything that's ready. Regular attention to a small garden is a good way to learn what it needs.
Sources +
- Oregon State University — Reducing lead hazards in gardens
- University of Maryland — Growing vegetables in raised beds
- University of Maryland — Soil testing and testing labs
- University of Maryland — Planning a vegetable garden
- Cornell — Sunlight is key to great vegetables
- Oregon State University — Watering Basics
- NC State — Home Vegetable Gardening
- University of Minnesota — Growing Beans
- University of Minnesota — Growing Radishes
- University of Maryland Extension — Vegetables in Containers and Salad Tables
- US EPA — Lead in Soil
- University of Minnesota Extension — Starting Seeds Indoors
- University of Georgia Extension — Planting and Watering Tomatoes
- University of Maryland Extension — Growing Lettuce in a Home Garden
- University of Maryland Extension — Soil to Fill Raised Beds
- Utah State University Extension — Beans in the Garden
- University of Maryland Extension — Sowing Vegetable Seeds Outdoors
- University of Maryland Extension — Growing Spinach
- University of Maryland Extension — Growing Carrots
- University of Maryland Extension — Growing Leafy Greens (including Kale)
- University of Maryland Extension — Growing Swiss Chard
- University of Maryland Extension — Growing Green Peas
- University of Maryland Extension — Growing Beets
- University of Maryland Extension — Growing Cucumbers
- University of Maryland Extension — Growing Summer Squash (Zucchini)
- University of Maryland Extension — Growing Peppers
- University of Maryland Extension — Growing Eggplant
- University of Minnesota Extension — Vegetable Crop Planning
- University of Minnesota Extension — Raised Bed Gardens
- Iowa State Extension — Growing Radishes
- University of Minnesota Extension — Compost and Manure Excess
- University of Minnesota Extension — Aged versus Composted Manure
- University of Maryland Extension — Drip Irrigation
- University of Maryland Extension — Caring for Vegetables
- University of Maryland Extension — Growing Broccoli
- University of Maryland Extension — Growing Cabbage
- Utah State University Extension — Onions in the Garden